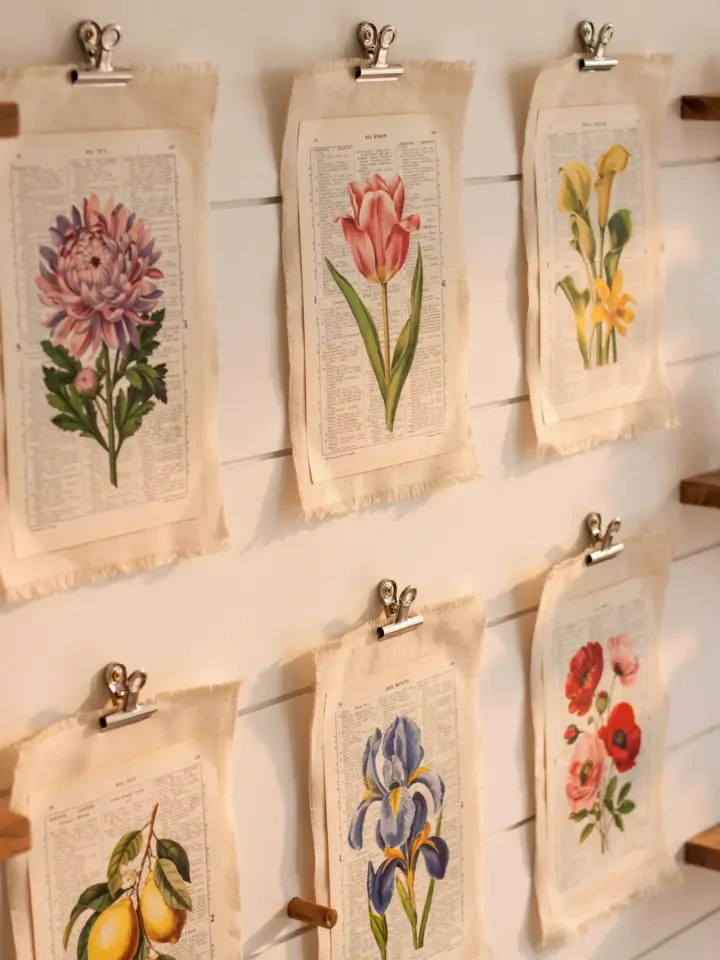
Botanical Wall Art DIY: Common Mistakes and How to Fix Them
There’s something irresistible about turning old book pages into a botanical wall art DIY. The blend of vintage paper, hand-stitched linen, and a simple frame can make any room feel like a cozy library or a quiet botanical garden. But if you have tried this project before and ended up with wrinkled pages, smudged ink, or a mat that just wouldn’t stay flat, you are not alone. I have made every mistake in the book (pun intended) and learned a few workarounds along the way. This guide walks through the most common pitfalls so your next botanical wall art DIY turns out crisp, clean, and gallery ready.
Mistake 1: Picking the Wrong Type of Book Page
Not every old book is a good candidate for printing. I once grabbed a paperback novel with thin, yellowish pages that felt perfect for the vintage look. But the minute I ran it through my printer, the ink bled straight through and left ghost images on the opposite side. The page also curled badly and refused to lie flat in the frame.
For best results, look for books with a medium weight paper that has a slight texture. Old textbooks, vintage encyclopedias, or poetry collections from the 1960s and earlier often work well. Avoid glossy pages, pages with heavy illustrations or text on both sides, and very fragile tissue thin paper. If you can hold the page up to the light and see your hand clearly, it is too thin for printing.
Mistake 2: Skipping the Test Print
It is tempting to load a whole stack of book pages and hit print. But every printer behaves differently with porous, uneven paper. I learned this the hard way when my first round of botanical images came out looking like watercolor blobs because the ink was absorbing too fast.
Take five minutes to print a single image on a scrap page from the same book. Adjust your printer settings to a lighter density or a draft mode. Check for bleeding, smearing, or uneven distribution. Once you dial it in, you can print the rest with confidence. This small step saves paper, time, and a lot of frustration.
Mistake 3: Using Low Resolution or Copyrighted Images
A beautiful botanical image can turn into a pixelated mess if the resolution is too low. Many free online images look fine on screen but print poorly at standard frame sizes like 5×7 or 8×10. I once printed a fern from a thumbnail sized file and the fronds looked like a broken pixel grid.
Stick to sources that offer high resolution files (at least 300 DPI). The Biodiversity Heritage Library, the Smithsonian Institution’s collection, and the New York Public Library’s digital archive all host thousands of vintage botanical prints that are free to use for personal projects. Always check the license if you plan to sell your art. For personal use, these resources are goldmines.
- Biodiversity Heritage Library – huge selection of antique botanical illustrations
- Smithsonian Open Access – high res and no copyright restrictions
- New York Public Library Digital Collections – beautiful floral and plant engravings
- Pixabay – search for botanical vintage illustrations, but filter by vector or large size
Mistake 4: Rushing the Linen Mat Cutting and Stitching
Adding a hand stitched linen mat gives your botanical wall art DIY that textural frame effect everyone loves on Pinterest. But cutting linen straight is harder than it looks. The first time I tried, the fabric frayed at the
#botanicalwallart #diyframedprint #bookpageart #linenmat #vintagehomedecor
Leave a Comment