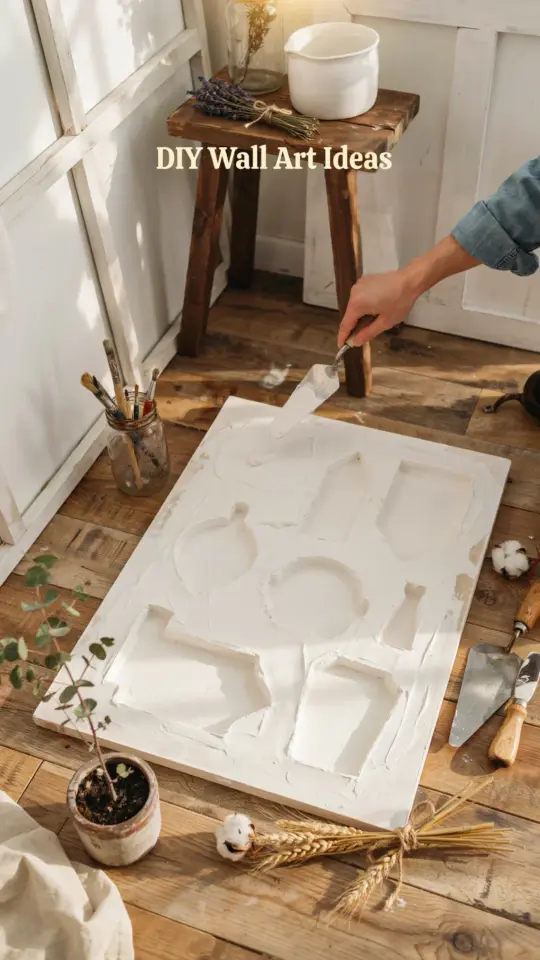
I first tried DIY textured wall art after seeing a few photos on Pinterest and thinking, “That looks simple enough.” I bought a canvas, some joint compound from the hardware store, and a cheap set of palette knives. The result was not pretty. But after a few messy attempts, I figured out a method that actually works. This article shares what I learned, so you can skip the trial and error and create a piece you are proud to hang in your living room.
Why Joint Compound Is the Best Option for Canvas Texture
You can buy special texture pastes from art stores, but they are expensive and dry quickly. Joint compound (sometimes called drywall mud) is cheap, forgiving, and easy to work with. A small bucket costs less than five dollars and gives you plenty of material for several canvases.
The texture is creamy but holds peaks and ridges well. It dries to a matte white, which makes a perfect base for paint or even a raw, minimal look. I prefer the pre-mixed lightweight compound because it is easier to spread and does not crack as it dries.
Supplies You Actually Need for This Texture Painting Project
Before you start, gather these items. You probably already own most of them.
- Canvas – a stretched canvas or a canvas panel. I use 12×16 inch for practice, but any size works.
- Joint compound – lightweight or all-purpose. Avoid the quick-drying kind if you are a beginner.
- Palette knives – get a set with different shapes: a straight knife, a diamond-shaped one, and a small rounded one.
- Disposable gloves – joint compound dries on skin and is hard to wash off.
- Drop cloth or newspaper – this gets messy fast.
- Paint – acrylic craft paint in any color, or even leftover wall paint.
- Sealer – optional, but a clear matte sealer protects the finished piece.
That is it. No special tools, no expensive mediums. You can start for under twenty dollars.
Step by Step: How to Apply Joint Compound for Homemade Canvas Art
Start by squeezing a generous dollop of joint compound onto the center of your canvas. Use the palette knife to spread it outward, leaving some areas thicker and some thinner. Do not try to make it even. The beauty of textured wall art is in the uneven peaks and valleys.
Try different knife motions: drag the knife straight across for long ridges, dab it for small bumps, or twist the blade to create swirls. I usually cover the whole canvas, leaving a half-inch border bare for a cleaner edge. Let the compound dry for 24 hours. It will look flat and white when ready.
If you want more dimension, add a second layer after the first dries. Press the knife into the compound at different angles. This step is where you can really experiment with patterns like waves, scales, or abstract lines.
Adding Color Without Ruining the Texture
The safest method is to paint the dried compound with acrylic paint using a soft brush or a sponge. I like to water down the paint slightly so it sinks into crevices without covering the high points. A dry brush technique (dipping a barely damp brush into paint and wiping most of it off) highlights the ridges beautifully.
For a modern farmhouse look, use whites, grays, or muted earth tones. For a boho vibe, dab on a mix of terracotta, sage, and mustard. Let each layer dry completely before adding another. You can also spray paint the canvas from a distance for a more even coat, but be prepared for some loss of sharp texture.
One tip that saved me: test a small corner first. I once painted a whole piece with a deep navy and realized the texture disappeared under the thick paint. Now I always do a patch test.
Fixing Mistakes: You Can Scrape It Off and Start Over
This technique is very forgiving. If you do not like the pattern, simply scrape the wet compound off with the palette knife and start again. If it has already dried, you can sand it lightly with fine-grit sandpaper, though you will lose some texture detail.
I once created a piece that looked like a pile of mashed potatoes. Instead of tossing it, I let it dry, sanded it flat, and reapplied a thinner layer with a different pattern. It turned out to be one of my favorite pieces. Do not be afraid to fail. The compound costs pennies, so mistakes are cheap.
Framing and Hanging Your Finished DIY Wall Art
A simple floating frame made of lightweight wood gives your textured canvas a polished look. You can buy a frame kit online or build one yourself using square dowels. The frame should sit about a quarter inch away from the canvas edge so the texture does not get squished.
If you prefer no frame, paint the sides of the canvas black or white for a clean finish. Hang the piece with picture hooks that can hold a few pounds – joint compound adds weight to the canvas. I use two hooks spaced evenly, not just one in the middle, to keep the canvas level.
What I Learned from My First Three Attempts
My
#DIYWallArt #TexturePainting #CanvasArt #HomeDecorDIY #TexturedCanvas
Leave a Comment