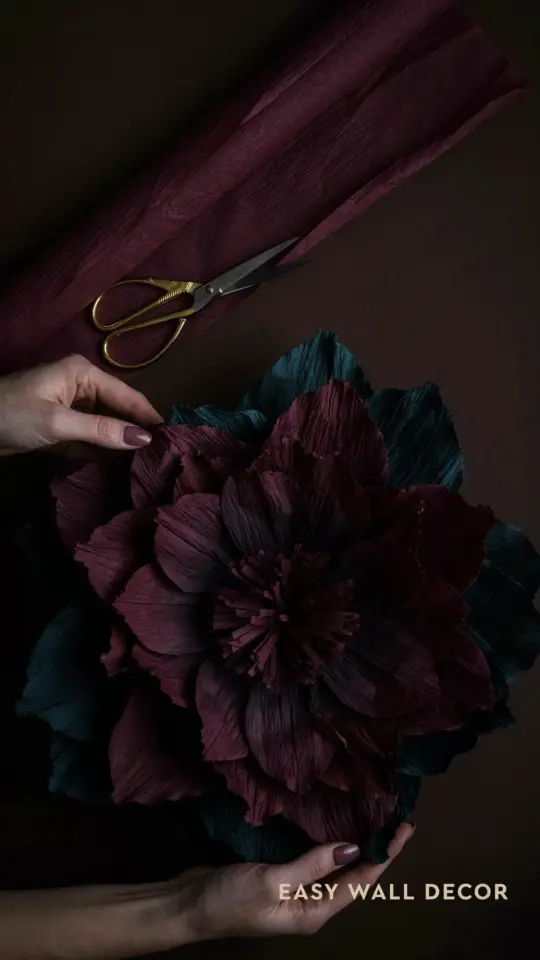
I recently took on a DIY giant paper flower wall decor project, and the before and after shots tell the whole story. A blank, boring wall turned into a lush, textured backdrop that looks like something from a high end event. The key was a single 40cm crepe paper flower. If you have never worked with crepe paper before, this guide is for you. I am not a professional crafter, and I still managed to make something that gets compliments every time someone walks into the room. Let me walk you through exactly how I did it, with no assumed knowledge.
Why Crepe Paper Works Best for Large Wall Flowers
When I first considered making a giant paper flower, I wondered what material to use. Cardstock is too stiff. Tissue paper is too fragile. Crepe paper hits the sweet spot. It has a natural stretch that lets you shape the petals into soft curves, and it is lightweight enough that a full sized flower won’t pull your wall down.
Crepe paper also comes in a huge range of colors. For my 40cm flower I chose a dusty rose, but you could go bright coral, deep burgundy, or even a white and gold combination. The crinkled texture catches light beautifully, giving the flower a realistic, almost fabric like look. And the price is a huge bonus. One roll of crepe paper costs a few dollars and will make several petals.
If you are looking for a material that is forgiving for beginners, this is it. You can crumple it, stretch it, and even tear it, but the final flower still looks intentional and professional.
Supplies You Need for a 40cm Giant Paper Flower
Before you start, gather a handful of basic supplies. Most of these you might already have at home. I have listed everything I used, including the specific sizes that worked for me.
- Crepe paper rolls – I used two rolls of 180gsm weight. One roll covers the petals, the other for the center and leaves. 50cm wide rolls work well.
- Scissors – Sharp craft scissors or even a good pair of kitchen shears. Dull scissors will fray the paper edges.
- Floral wire – 18 gauge or 20 gauge wire for the stem and to support the petals. You can find this at any craft store.
- Hot glue gun and glue sticks – High temperature glue dries fast and holds strong. Low temp works but may take longer to bond.
- Cardboard template – I traced a large dinner plate for the petal shape. A free printable template from YouTube also works.
- Floral tape – This green stretchy tape helps finish the stem and hide glue lines.
- Command strips or removable adhesive – For hanging without damaging the wall. Heavy duty strips hold up to 5 pounds, which is enough for this flower.
That is genuinely everything. No special cutting machine, no expensive tools. Just basic craft supplies that fit in a small bag.
How to Make the Petals: A Step by Step for Absolute Beginners
I started by cutting a petal template from cardboard. I made it roughly 20cm long and 12cm wide at the widest point, rounded at the top and slightly pointed at the bottom. Then I folded my crepe paper so the grain runs vertically. Crepe paper has a stretch direction. You want the stretch to go across the petal width, not the length. That way you can curl the edges outward.
Trace the template onto the folded paper and cut through all layers. I cut six large petals and four slightly smaller ones. The number varies depending on how full you want the flower, but six large is a good starting point for a 40cm bloom.
Here is the step that makes all the difference: cup each petal by placing your thumbs in the center and gently pulling the paper outward. You will feel it give. Then curl the top edges backward over a wooden spoon handle or your finger. Do this for every petal. It turns flat paper into a curved, realistic shape.
Assembling the Flower: From Petals to Full Bloom
With all petals shaped, I made the center. I cut a strip of crepe paper about 10cm wide and 40cm long. I fringed one long edge with scissors, then rolled it tightly into a bud shape, securing the bottom with hot glue. That becomes the core of the flower.
Now I attached the petals. Start with the smaller petals first. Apply a line of hot glue to the base of a petal and press it against the bottom of the center bud. Overlap the next petal slightly over the first. Continue around until all four small petals are attached. Then add the large petals in the same way, positioning them between the gaps of the previous layer. Glue each one securely, but do not flatten the petal, keep it cupped upward.
The result is a layered look. I gently fluffed the petals outward as the glue cooled. If a petal felt too flat, I cupped it again with my hands. This whole assembly took about fifteen minutes. It felt much easier than I expected.
Hanging Your Giant Paper Flower on the Wall
A 40cm flower is big but remarkably light. The entire flower plus stem weighed maybe 200 grams. I did not want to damage the paint, so I used Command picture hanging strips. I glued a small piece of cardboard to the back of the flower to create a flat surface, then stuck the strip onto that.
Alternatively, you can attach a loop of ribbon or wire to the stem and hang it from a nail or screw hook. If you want a cluster of flowers, plan the arrangement on the floor first. Mark the wall with a pencil dot where each flower will go. I hung mine slightly off center next to a mirror, and it became the focal point of the whole room.
Pro tip: Crepe paper dust collects over time. A quick blast from a hair dryer on cool setting or a soft paintbrush will clean it without damaging the flower.
Before and After: The Impact of a Single Giant Flower
The bare wall before was just white paint with a small picture frame that never felt right. After hanging the flower, the whole corner softened. People who visit ask if I hired a decorator. They cannot believe it is paper.
The scale makes a difference. A 40cm flower commands attention without overwhelming the space. It works above a bed, beside a gallery wall, or as a backdrop for a small party. I have since made two more in different colors and placed them in a cluster. That took the look from simple to stunning in under an hour.
If you are on the fence because you think you are not crafty, trust me, this project is genuinely beginner proof. The stretches and curls hide small mistakes. Every flower ends up looking unique and handmade in the best way.
I recorded the entire process on my YouTube channel, from cutting the template to the final hang. If you want to see the exact steps and get the free petal template, check the video link in the description. Grab some crepe paper, set aside an evening, and turn your blank wall into something you will love waking up to.
#diypaperflowers #paperflowers #paperflowerwall #crepepaperflowers #giantflowers
Leave a Comment