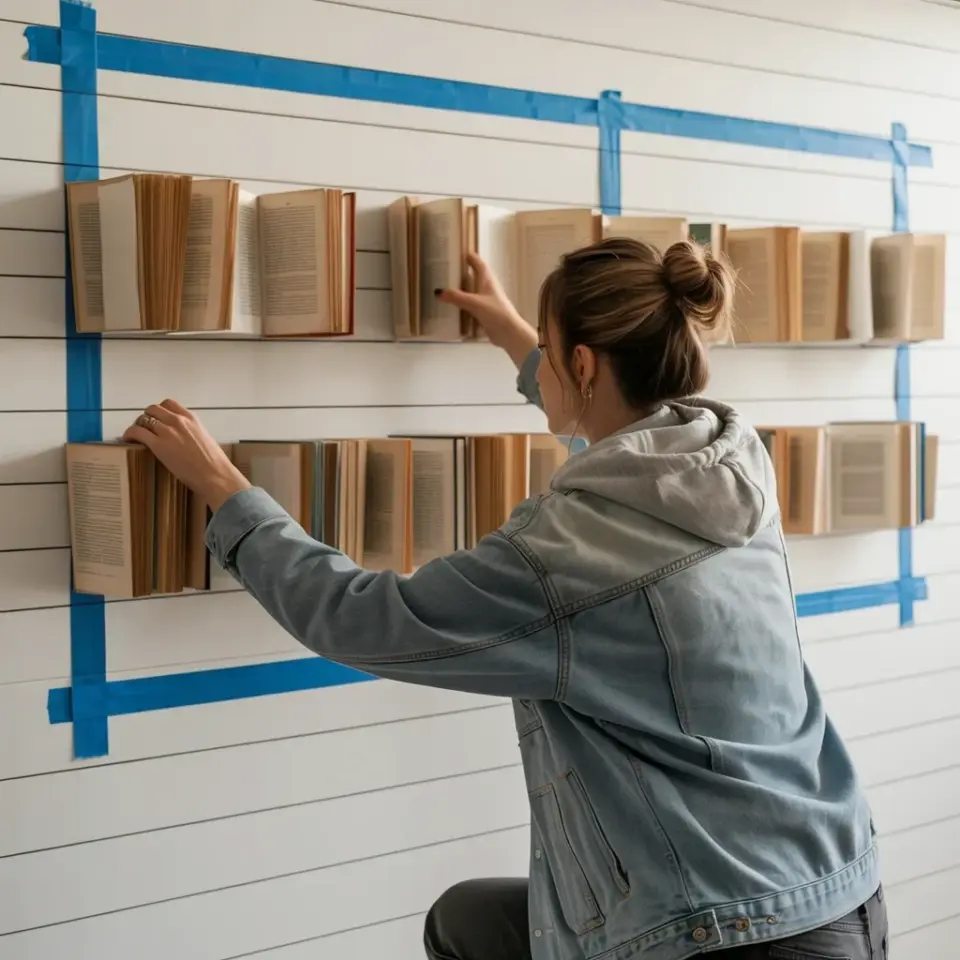
If you’re planning a wall bookshelf and you haven’t taped out the frame on the wall yet, stop. Honestly, that’s the mistake I see everyone make, including myself the first time. In the photo above, I’m kneeling in my gray denim jacket with my hair in a top bun, adjusting a row of vintage books against a white shiplap wall. The blue painter’s tape outline is the whole reason those shelves look balanced. You tape the rectangle first, step back, stare at it for a while, move the tape, then pick up a drill.
Why You Should Tape Out the Shelf Frame Before Hammering Anything
Look, I get it. You want to get the shelf up quickly and the measuring tape feels like enough. But a wall bookshelf lives or dies by its proportions, and you cannot feel proportions from a number on a measuring tape. Blue tape gives you a full-size preview of the exact footprint. It turns an abstract dimension into something you can walk past and squint at.
Here’s the thing: the tape is cheap. The mistake is not. When I first built shelves without taping, I ended up with a frame that sat too high, and I only noticed after the brackets were anchored. That meant patching four screw holes and starting over. Tape first, and you’ll catch the awkward stuff before it costs you an afternoon.
- Tape out the outer rectangle first, including the shelf height and depth.
- Walk around the room and look at it from different angles. Sit down, stand up, move left and right.
- Stack boxes or books inside the taped area to simulate the final weight and volume.
- Take a photo. A phone camera flattens the space and shows you imbalances your eyes miss in person.
That last one is a trick I learned from a painter, and it’s saved me more times than I can count. The photo in this article is a perfect example. The tape frame looked fine in person, but in the image I could tell the left side felt heavier than the right. So I shifted the tape before any wood arrived.
Shiplap Wall Installation Tips That Save Your Drywall
Shiplap walls are beautiful, but they are also deceptive. The grooves between the boards create a rhythm that messes with your sense of level. And unless your shiplap is covering a solid plywood substrate, you still need to hit studs behind it. Don’t assume the horizontal lines correspond to anything structural underneath.
Use a stud finder, but be prepared for false positives. The vertical seams between shiplap boards can confuse the sensor, so mark your studs both above and below the taped outline. Drill a tiny pilot hole through the groove if you have to. That hole will hide behind the shelf bracket, so no one will ever see it.
Another shiplap wall trick: ignore the board lines and use a long level across the entire frame. The tape gives you a visual, but the level gives you the truth. A bubble that reads perfectly level across a 36-inch span is worth more than any aesthetic guess.
Styling Vintage Books: Open Pages, Horizontal Stacks, and Worn Spines
Vintage books are not like new hardcovers. They have personality, and they do not stand up straight even when you want them to. That’s why I love arranging them horizontally with the pages open. The yellowed, aged pages in this photo are part of the design. They add a texture that no new book can replicate.
Don’t force them into perfect symmetry. Alternate between a horizontal stack, a leaning pair, and a single upright volume. Let the spines face different directions. Some of these old books have faded titles, which is fine. Honestly, the wear is the appeal. The cracked hinges and the foxed pages tell a story.
One practical warning though. Open books collect dust at an alarming rate. I learned this the hard way when I left a row of open antique books on a shelf for six months and had to clean each page individually. Keep them open for the photo, or for a week, but don’t set them up that way permanently unless you enjoy dusting with a soft brush every few days.
DIY Bookshelf Installation: Choosing a Shelf Depth That Fits Your Books
When I talk about a DIY bookshelf, people assume the hard part is the carpentry. But the real challenge is the depth. An open vintage book is wider than its height, and it sticks out in ways a closed book never does. If your shelf is only 8 inches deep, those open pages will hang off the front edge and look precarious.
Take a few of your largest books and measure them before you order any shelving. I typically go with a 10 or 12 inch depth for these wall-mounted units. That extra few inches gives you room for the book, the pages, and a little breathing space at the back. The shelf in this photo sits deep enough that the open books barely overhang the lip.
Bracket placement matters just as much. If you use two brackets, place them close to the ends, not right under the books. Old books are heavy, and the weight concentrates at the binding. A third bracket in the middle is overkill for most small shelves, but I will never criticize it. I’ve seen too many sagging boards to trust a wide span without support.
Adjusting the Spacing After the Shelf Is Up: A Two-Person Job
Here’s where the patience really pays off. In this photo, I’m kneeling and adjusting the books one by one. My hand is on a single volume, shifting it a quarter of an inch at a time. You cannot do this well with the shelf already loaded down with everything. You need to set the main pieces first, then fine-tune the gaps.
A second pair of eyes helps enormously. One person stands back and calls out adjustments, the other moves the books. It’s slow, deliberate work, and it feels a little silly because you’re just nudging paper. But that’s the difference between a shelf that looks organized and one that looks like you threw a pile of books up there.
And if you’re working alone, take a photo after every adjustment. Compare the photos to the tape outline you made earlier. The visual repetition will train your eye to catch the uneven spaces. I still do this every single time. There is no shortcut for stepping back and looking again and again.
A Final Word on Working with Old Books Without Ruining Them
Old books deserve a little tenderness. The pages in this photo are yellowed and brittle, so I’m not bending them further than they already want to go. When I open them for display, I open to a page near the middle where the binding is most relaxed, and I never force it flat. Let the book hold itself open naturally.
Also, wash your hands before handling them. The oils from your skin stain old paper faster than you’d think. And if you’re placing them directly on a painted shiplap wall, check that the paint is fully cured. Otherwise, you’ll get little paint marks on the covers. I made that mistake with an antique copy of a travel guide, and now there’s a white speck on the spine that will never come off.
The smell of those pages is something else. It’s sweet and a little musty, like old cinnamon and dust. My grandmother’s encyclopedias always smelled like that, and every time I open one of these vintage books, I’m back in her hallway. That’s the real reason I keep using them in my home DIY projects. Not for the look, but for the memory.
So, save this post for your next shelf project. And when you’re ready to start, grab a roll of blue painter’s tape before you grab anything else. Tape it out, live with it for a day, then build. Your wall bookshelf will thank you.
#wallbookshelf #shiplapwall #diybookshelf #vintagebooks #homediy
Leave a Comment